Configuring Azure Active Directory login with Umbraco

It’s been a while since I first set this up and back then not all of these settings were in the new Azure portal, but now that they are getting this all configured is quite easy so here’s the basic steps!
Install the Nuget package
First thing to do is get the UmbracoCms.IdentityExtensions.AzureActiveDirectory package installed
(This will also install the UmbracoCms.IdentityExtensions base package)
Configure Azure Active Directory
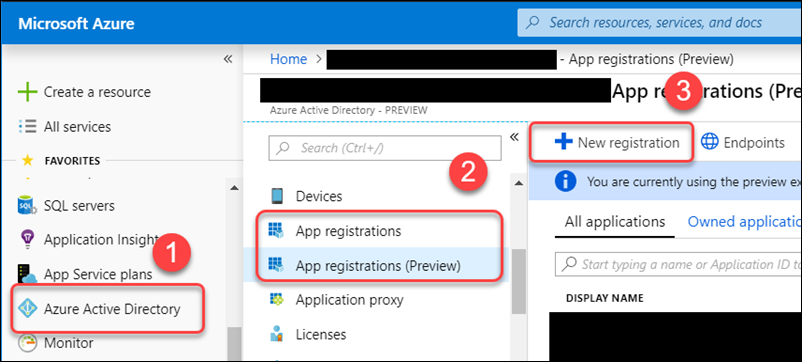
Head over to the Azure Active Directory section on the Azure portal, choose App Registrations (I’m using the Preview functionality for this) and create a New registration
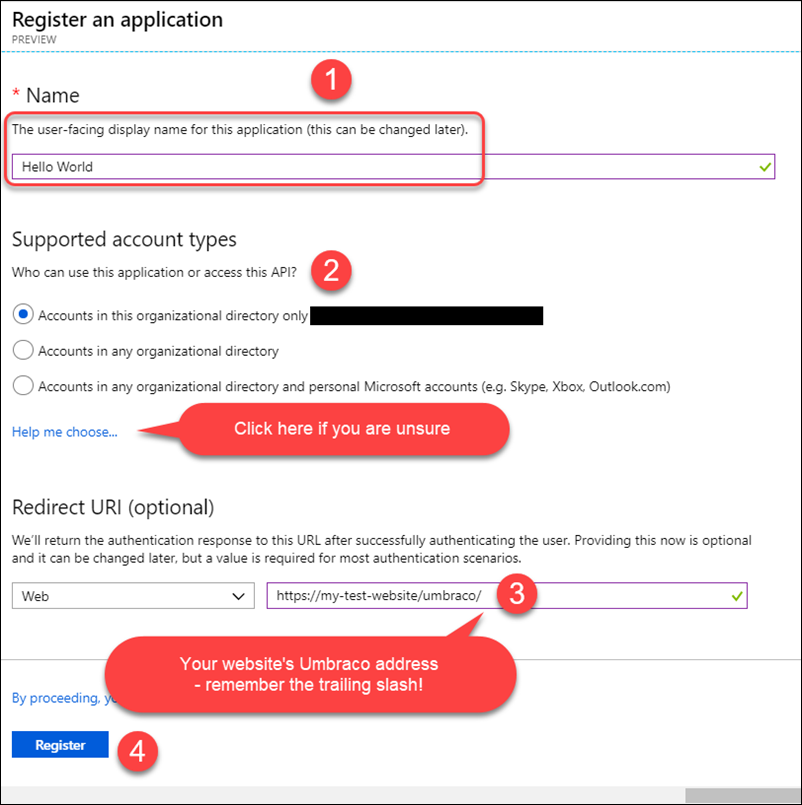
Next fill out the app details
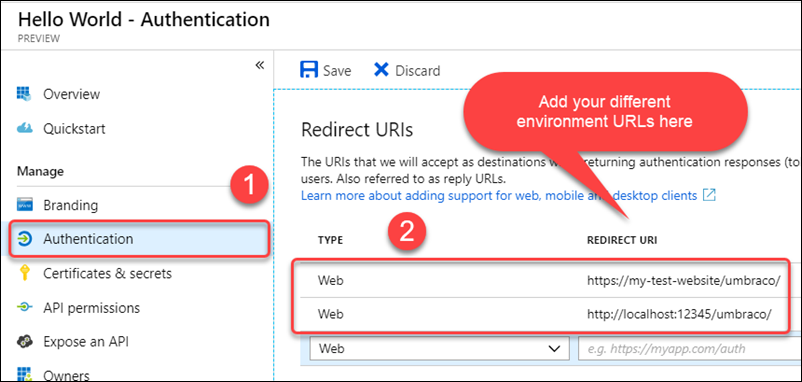
Add your redirect URLs for any additional environments
If you have local, dev, staging, live, etc… sites, you’ll need to configure those URLs here, always make sure it’s the Umbraco path with a trailing slash.
Make note of some settings
The settings you’ll need to copy are the Application/Client ID and the Tenant ID along with the redirect URLs.
Configure you application
- Add the Client Id, Tenant Id and redirect URL to AppSettings. I’ve used the keys: azureAd:tenantId, azureAd:clientId, azureAd:redirectUrl but you can choose whatever you like.
- Open the App_Start/UmbracoStandardOwinStartup.cs file that was installed with the IdentityExtensions pakage
- Underneath the call to base.Configuration(app); add the block of code that was shown in the readme shown after you installed the Nuget package which looks like this:
app.ConfigureBackOfficeAzureActiveDirectoryAuth( //The Tenant can also be "YOURDIRECTORYNAME.onmicrosoft.com" tenant: ConfigurationManager.AppSettings["azureAd:tenantId"], clientId: ConfigurationManager.AppSettings["azureAd:clientId"], //The value of this will need to change depending on your current environment postLoginRedirectUri: ConfigurationManager.AppSettings["azureAd:redirectUrl"], //This is the same as the TenantId issuerId: new Guid(ConfigurationManager.AppSettings["azureAd:tenantId"])); - Ensure that this OWIN startup class is defined in your web.config: <add key="owin:appStartup" value="UmbracoStandardOwinStartup" />
That's it!
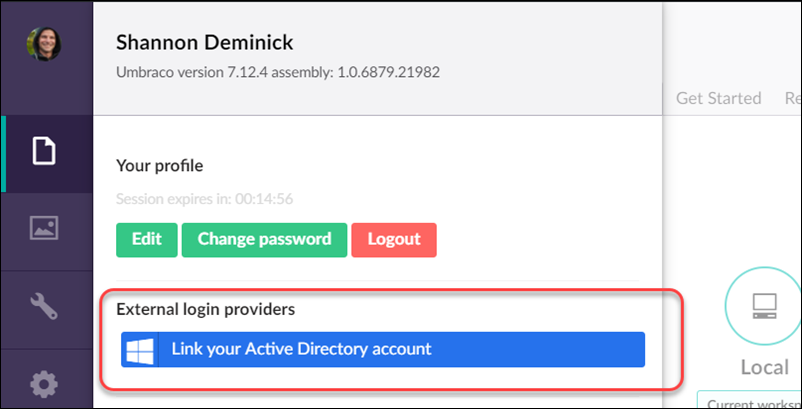
Once you’ve got this configured, and you login to the back office normally you can then link your AD account:
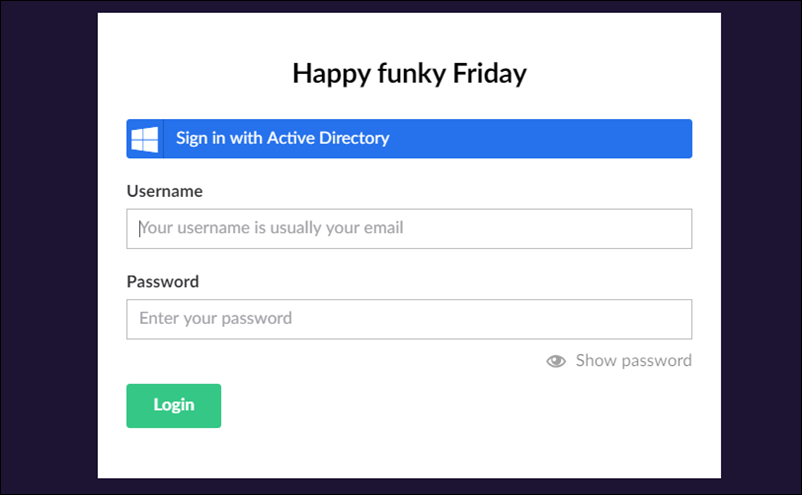
Once linked, you can login with this provider:
Auto linking?
If you configured your AD App to only authenticate “only accounts in this organization”, you might want to auto-link Umbraco back office accounts. Auto-linking will automatically ensure that a local Umbraco user account exists for any user that logs in via the AD provider. This is handy if you want to do all of your user administration via Azure AD. Auto-linking can be configured as part of your OWIN startup class.
I won’t cover auto-linking in this post but there are some docs available for that.
